We previously wrote about how the Hab Bazaar makes your shipping process over 69% easier and faster by integrating with a bulk shipping label buy/print service… but what if you’re mailing a bunch of small items which weigh less than the max for a stamp or two? Well, the Hab Bazaar helps with that too!
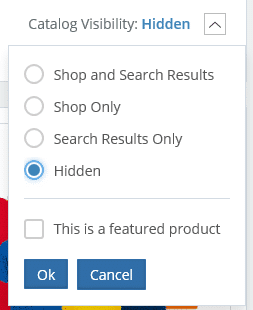
Did you know? Many of our vendors are selling individual patches, but you’re more than welcome to use the platform to organize your patch giveaways too! Just make the item have a zero price, and if you want to only allow people to purchase them who have the link, you can change the visibility setting to “hidden.” There is no site hash cash for free items either, so give it a shot!
My Process
Of course, it’s best to come up with your own process which you can remember and you’re comfortable with. As the Hab Bazaar site owner, one of the things I do is give away a Hab Bazaar Patch for free with every $50+ order. So, I’m sending out quite a bit of envelopes on a regular basis.
Here’s how I manage it quickly, easily and accurately using the Hab Bazaar vendor platform:
You’ll need a printer, stamps, envelopes, and a word document that’s set up in the same size and shape of your envelopes. And of course, you’ll need to have made sales on the Hab Bazaar platform :-).
By using the Hab Bazaar to manage my orders, I’m presented with this lovely list of all my orders, on my Orders page from the Vendor Dashboard. It’s easy for customers to send you their information and even easier for you since you don’t have to keep track of anything manually:
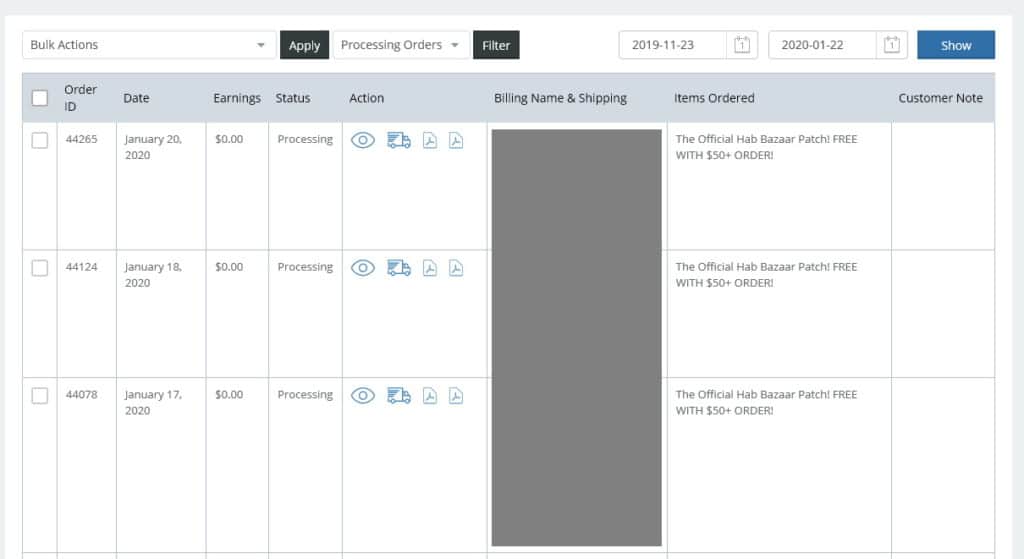
The default display shows Processing orders, so next I can simply copy the shipping address from the “Billing Name & Shipping” column, as long as the items match what I’m doing and I know that whatever the quantities are they’re fitting in that envelope. Depending on your situation you may need to open each order using the eyeball button Tip: Middle click to open in a new tab.
I paste the address into my word document. I usually right click and paste text only so I preserve the font and format. Note that in this example, I’ve got a little text box in the bottom left so I can keep track of what goes in the envelope once it’s printed, especially if I have more than one patch.
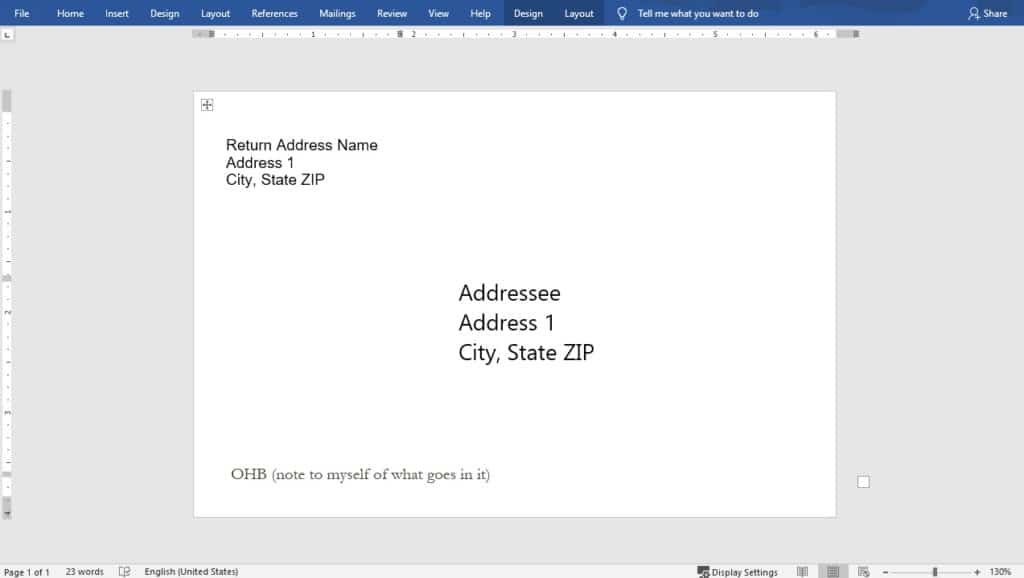
I paste one address and I print it. Then I paste the next address, so on and so forth, until all I’ve printed all the envelopes I need from the list. When I’m done with the last one, I save the word doc with the last address in it, as a final check and balance in case I forget to do the next steps. Download this word document template here!
Note: For my printer, I don’t have to do anything special to the registered paper size. I just put the envelopes in the paper tray and print this properly sized word document. Your printer may be different.
Now, I have all my envelopes printed. Way better than hand-writing them, or copying and pasting each one into a label template and hoping they print correctly. Just copy/paste/print!
Now it’s time to stamp and stuff the envelopes. I make sure to put either a regular Forever Stamp or an International Stamp, stuff, and seal. Now I can just drop them in the mailbox!
Finally, I need to mark each one of the items as shipped so it sends an email alert to the customer. We just click the blue truck icon and enter info in the popup. In my Firefox Browser, it saves my previous inputs so I can quickly fill them in the boxes. You can also highlight the text and drag it to the field. In this case, there’s no tracking number since it’s just a stamp. This is how I like to do it. Click submit to send the info automatically in an email, and then the blue truck is now black.
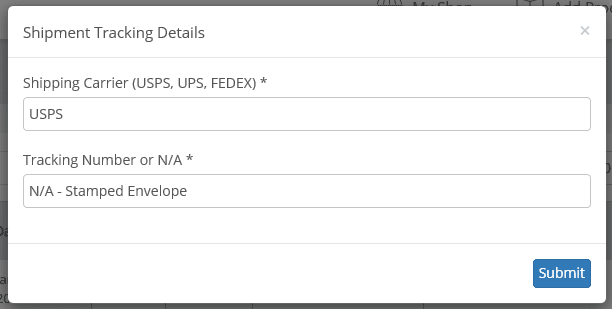
I do this for all the envelopes I have stamped and stuffed. Next I need to mark all these orders as complete to keep my orders list organized, so I just check the box for each order I want to change, then use the “Bulk Actions” area to mark all of them complete.
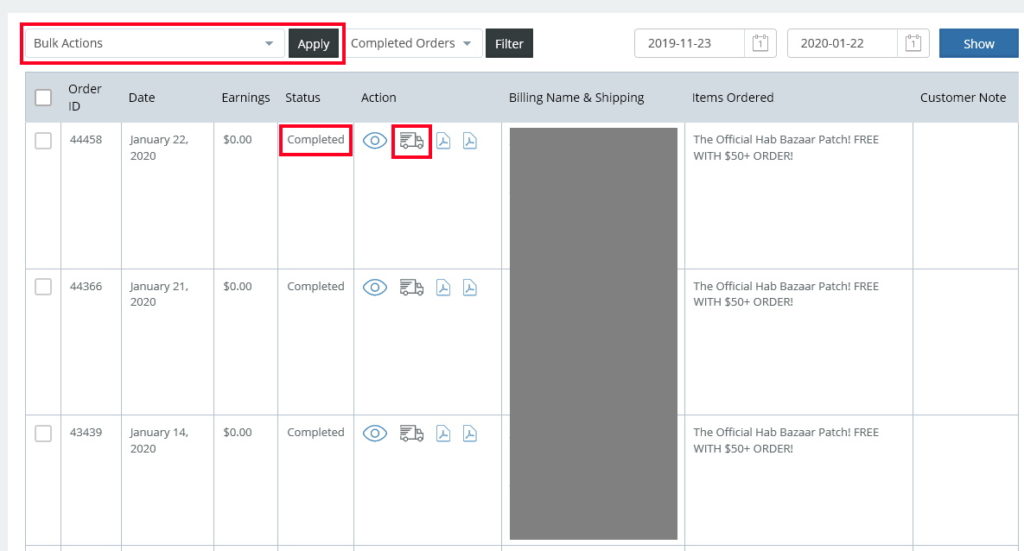
There you have it, we’re done! To sum up, we have:
- Pasted an address from the Hab Bazaar into our properly sized word document template.
- Printed it onto an envelope.
- Pasted again and printed again until all the envelopes were printed.
- Stamped, stuffed, and sealed the envelopes.
- Dropped them in our mailbox.
- Marked them as shipped using the truck icon so our customer knows it is on its way, and so we have a visual indication that we did.
- Marked each order as complete to clear it from our Processing Orders list.
With all the time we’ve saved, I think it’s time for a nice relaxing beer. Cheers!

